miércoles, 18 de enero de 2023

Tarjetas Trinchies

Hola, hoy te traigo un tutorial lleno de color y textura donde los protagonistas son mis adoradas Lindy´s y sellos de AALL & Create, espero te guste y lo pongas en práctica.                                                      

Son una tarjetas cuadradas de 3 pulgadas de díametro (si preferis los centímetros a la hora de trabajar 7,6), llamadas "Trinchies".


Empezamos! Recortamos nuestras tarjetas en papel acuarela, y sin necesidad de añadir agua , rociamos las tintas en sprays (recordar que al usar Lindy´s trabajamos con tintas traslúcidas, por lo que es aconsejable empezar por tonos claros hasta llegar a los oscuros.).


Voy dejando secar preferiblemente al aire, pero podemos ayudarnos de un secador para acelerar el proceso. Al finalizar tenemos ya la capa de color sobre la que trabajar.


Para el siguiente paso, necesitamos que nuestra tarjeta este totalmente seca, elegimos un sello de fondo, aplicamos tinta de embossing (utilizo VersaMark) , estampamos, aplicamos los polvos de emboss y fundimos ayudándonos de una pistola de calor.
Además de interés y textura a nuestro fondo, conseguimos diferentes efectos aplicando blanco o negro.
 

El siguiente paso es troquelar en papel de acuarela círculos y ayudándonos de un pincel de abanico, aplicamos pigmentos.


Y cuando aplicamos agua ( utiliza un pulverizador) , nuestros pigmentos reaccionan.Como te comentaba al inicio , prefiero dejar secar al aire, pero podemos ayudarnos de un secador.


Cuando el círculo ha quedado completamente seco vamos a necesitar un stencil , y aplicamos sobre el mismo tintas oxide, o pigmentos magical.


Rociamos agua sobre la tinta/pigmento y utilizamos el stencil como si fuera un sello y lo "estapamos", el resultado debería quedarnos como en la foto.


Vamos a utilizar un stencil de círculos, (si no tenes podes dibujarlos) y aplicamos gesso ayudándonos de una esponja para estarcido (nuestros dedos también valen)


Al estar seco , vamos a colorear con ayuda de lápices acuarelables o permanentes en tonos similares al fondo. Utilizamos el color negro para añadir profundidad, y para aportar interés al fondo, aplicamos algún sello de palabras. 


Para integrar los elementos  unas salpicaduras en acrílica blanca y/o rotulador Posca. 
 

Ya tendríamos nuestros fondo , simplemente nos queda pegar el círculo en la tarjeta, y elegir un punto focal acorde a nuestro fondo. Te dejo varias fotos del proyecto y  si te animas a hacer tu versión  coméntamelo, que me hará mucha ilusión .


lunes, 16 de enero de 2023

Xmas Cards

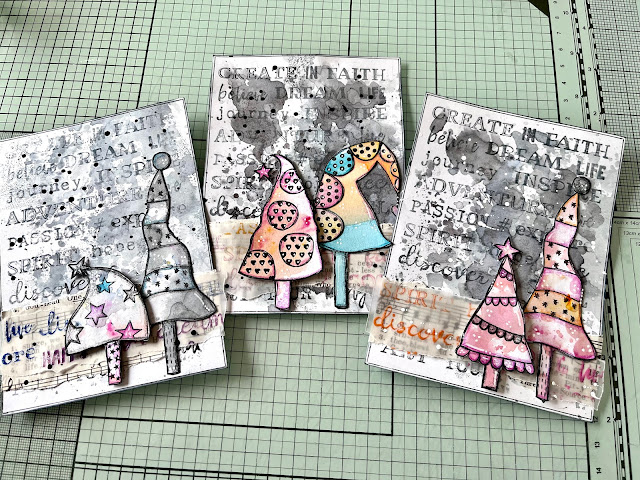
Hi, I'm Vero (@Vero.kt) and welcome to today's inspiration. How's everybody? I've been playing around with some of the Rubber Dance designs to create a christmas theme card.

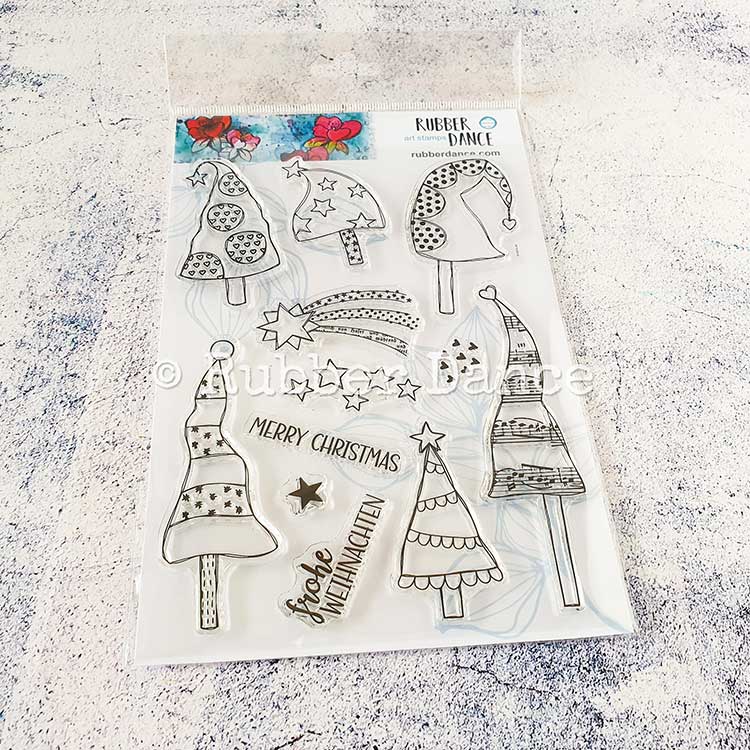
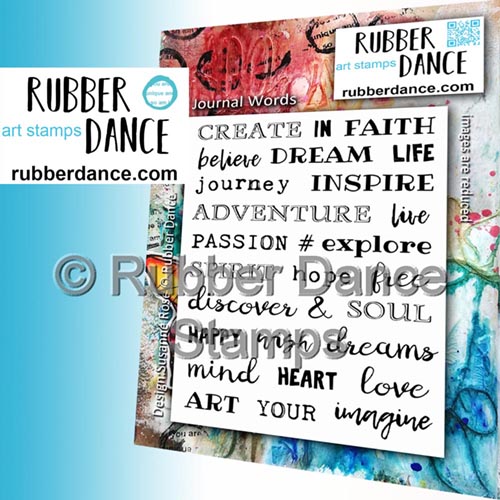
I have used Textured Xmas Trees Clear and Journal Words

Shall we start?We need watercolor paper that we have previously cut to a size of 10x15 cm.And we create a gray background playing with inks or pigments.


We use a heat gun to speed up the process, and we stamp in tones similar to the background with the Journal Words stamp, we are not looking for perfection in stamping, we want to add texture and interest.


We stamp and color the different Christmas trees of the Textured Xmas Trees Clear set.


We stamp the Journal Words stamp on vellum paper with oxide inks of different shades, and we apply transparent embossing powder.


I add a few splashes of black and white acrylic paint and simply add the elements to finish the composition.


I leave you some photos with details of the project.I hope you like it as much as I do when making them.


Thanks for stopping by! xx Verónica

Here are the Rubber Dande Stamps I used:


martes, 22 de noviembre de 2022

Journal Word Tag

Hi, I'm Vero (@ Vero.kt) and I welcome you to today's inspiration. How's everybody ? I've been playing with  Mix it up 2Journal Word,  Mixed media marks 1 and Pencil Marks 3 to create a Tag that I hope you like.

On watercolor paper, I play with different spray inks to create a colorful layer and use a blow dryer to speed up the process. I choose a stencil and apply micro distress glaze (this medium is waterproof, so the surfaces you apply it to won't be affected by water. You can use it as a resist when applying watercolors or any water-based paint or ink) 


I use a dryer to speed up the process and to add interest and depth to the page, I stamp different stamps with permanent ink.


To add light and texture to the background, I add texture paste with a stencil.


One of the parts that I enjoy the most is the composition, I have to admit that it is usually the part that takes me the most.Now I leave you some photos with details of the project.I hope you like it as much as I do when making them.


Here are the Rubber Dande Stamps I used:


I hope you enjoyed and don't forget to visit regularly. The team has amazing inspirations every day, just for you.

Verónica.


miércoles, 26 de octubre de 2022

Pencil Marks Tag

Hi, I'm Vero (@ Vero.kt) and I welcome you to today's inspiration. How's everybody ? I've been playing with Mix it up 2 , Mix it up 1 Mix a sentiment 3 and Pencil Marks 6  to create a Tag  that I hope you like .

On watercolor paper, I play with different spray inks to create a colorful layer and use a blow dryer to speed up the process. I choose a stencil and apply micro distress glaze (this medium is waterproof, so the surfaces you apply it to won't be affected by water. You can use it as a resist when applying watercolors or any water-based paint or ink) .)

I use a dryer to speed up the process and to add interest and depth to the page, I stamp different stamps with permanent ink .


One of the parts that I enjoy the most is the composition, I have to admit that it is usually the part that takes me the most.A few splashes with white acrylic and we would have our page.Now I leave you some photos with details of the project.I hope you like it as much as I do when making them.


Here are the Rubber Dande Stamps I used:


Mix It Up #1 (Clear - 0025)

Mix It Up #2 (Clear - 0026)


I hope you enjoyed and don't forget to visit regularly. The team has amazing inspirations every day, just for you.

Verónica.